I hope you all enjoyed your day at our Super Saturday activity! I know I enjoyed crafting, talking and having fun with so many wonderful people!
Just a reminder that all of the instructions can be found if you click on the "Instructions" tab at the top of the screen. If you are looking for where I got the inspiration for most of these crafts, check out my Pinterest board Super Saturday Craft Ideas that I put together along the way.
If you are looking for more information on a certain craft or if the instructions aren't clear, please just comment on the blog post and I will check it every now and then to see if anyone needs any help!
Thanks again for making this such a wonderful activity!
Happy Crafting!
-Jenna
Sunday, November 17, 2013
CLASS: Turkey Roasting
TURKEY TIPS
Turkey is usually the centerpiece of our Thanksgiving
tables. Producing a juicy, flavorful
turkey can be a challenge but the following tips and techniques will help you
put a beautiful turkey on your table without a lot of stress.
Selecting a
turkey: Fresh turkeys usually taste
better than frozen turkeys and are easy to find during the holidays; choosing a
free-range turkey that was fed organic grain is ideal. However, many good-quality frozen turkeys are
just fine – try to avoid self-basting turkeys which are injected with a yellow,
fatty substance to keep them moist.
What size turkey to
buy: For best results, buy a turkey
that weighs more than 10 pounds. If you
want a smaller bird, a turkey breast is a better choice. To ensure ample servings for Thanksgiving
dinner as well as generous leftovers, allow for 1 – 1 ½ pounds of turkey per
person.
Storing the
turkey: If you choose a fresh turkey
order it from your butcher and pick it up the day before it is to be
roasted. Store it in its original
wrapping in the coldest part of the refrigerator. Frozen turkeys should also be kept in the
refrigerator as they thaw to keep bacteria from multiplying. Figure on 3 – 4 hours per pound for turkeys
to thaw, and keep in mind that it may take 2 – 5 days for a frozen turkey to
defrost completely, depending on its size.
Thawed turkey should be cooked within 2 days and should not be refrozen,
or the texture of the meat will suffer.
Essential turkey
prep: Remove the giblets from the
neck cavity and anywhere else they may be – check! Rinse the turkey with cold water and pat
dry. Let the turkey stand at room
temperature for 1 – 1 ½ hours (but no longer) before roasting.
Flavoring
turkey: Turkey is a delicate,
mild-flavored type of poultry that can be enhanced with different flavor
components. Due to its mild flavor it
works very well with the following flavor techniques:
- Brining: A traditional method of preserving foods
before the days of refrigeration, brining is a cooking technique that more
and more people are turning to because it adds flavor and juiciness to the
classic roasted turkey.
- Wet Brine: A wet brine penetrates into food much
more deeply than a marinade. Water
from the brine enters each meat cell, making the meat juicier while
infusing it with flavor. Brining
helps keep the meat juicy without giving it a salty taste. You can make your own brine mix (recipes
are online) or buy one from your grocery or specialty foods store.
- Dry Brine: Dry brine mixes are blends of fragrant
herbs and spices that are mixed with kosher salt and that mixture is
rubbed on the turkey and allowed to rest in the refrigerator. The salt’s natural properties draw
moisture to the surface of the meat where it joins with the aromatics to
create a savory marinade that re-enters the meat. Again, you can make your own brine mix
or buy one.
- Note #1: Whether you use a wet brine or a dry
brine, your turkey must be thoroughly rinsed, inside and
out, prior to roasting, and, using paper towels, patted as dry as you can
get it.
- Note #2: If you purchase a Kosher turkey you
don’t need to brine at all – they are already brined in the koshering
process.
- Compound Butters/Pastes: These are a blend of unsalted butter or
oil with herbs, spices, rubs, citrus zest or other flavorings. Let the butter stand at room temperature
for at least 30 minutes to soften, then cream the butter until it is soft
and fluffy. Add in your desired
flavorings and mix well. If using
an oil, choose one with flavor such as Extra Virgin Olive Oil or Grapeseed
Oil and mix with your flavor choice to form a paste. These butters and pastes are commonly
rubbed on and under the skin of the bird.
As the turkey roasts, the butter melts into the flesh, keeping the
meat moist and creating a crisp, golden-brown skin.
- Flavor Injecting: Another way to add flavor is with a
flavor injector, a kitchen tool used to insert marinade deep into the meat
of the bird. Injectors are
stainless-steel syringes filled with liquid marinade. The flavors, which
should always include a fat of some kind, injected into the flesh of the
turkey helps keep it moist during cooking and imparts complex layers of
flavor.
- Aromatics: Many cooks will also combine aromatics
into their flavoring of the turkey.
This can be done by placing fresh or dried herbs as well as
vegetables and fruits into the cavity of the bird, sometimes under the
skin and around the pan. As the
turkey roasts, the aromatics give off flavor that is incorporated into the
final flavor of the turkey. Some
popular choices are fresh sage, herbs de province, lemon or orange slices,
apples, onions and carrots.
Stuffing a
turkey: Roasting a turkey unstuffed,
with dressing baked separately, saves time and effort – and results in a more
evenly cooked bird and one that cooks faster.
But for many people, a stuffed bird is a Thanksgiving tradition and many
love the extra flavors that are imparted from the turkey. Here are some basic guidelines to follow if
stuffing a turkey:
- Prepare
stuffing just before roasting. This
way warm stuffing can be put into the bird and directly into the
oven. If you do make it ahead, warm
it before filling the turkey.
- Never
put stuffing into a bird the day before (or even several hours before)
roasting. The warm stuffing can
breed bacteria from the bird.
- Do not
pack stuffing too tightly inside the turkey as it will expand during
cooking. Truss the main cavity to
hold the stuffing inside, if desired.
- Cook
stuffing to 165 degrees F on an instant-read thermometer. If it is not done and the bird is, transfer
the stuffing to a baking dish and bake until it tests done.
- If
adding meat to a stuffing, cook it thoroughly first.
Roasting: One of the oldest and simplest forms of
cooking, roasting refers to cooking food in an uncovered pan in the dry heat of
an oven. One of the most appealing
qualities of roasted foods is the beautiful and delicious brown crusts that
develop in the oven. Contact with heat
causes the sugars and proteins in food to form compounds on the surface similar
to caramel, forming a flavorful crust.
Simultaneously, the steady oven heat slowly penetrates to the center of
the food, which remains juicy. This is a
favorite cooking method for turkey. Here
are some basic steps to follow:
- Turkey
should be as close as possible to room temperature – take out of the refrigerator
1 – 1 ½ hours prior to roasting.
For best results, roast your turkey on a rack in an open roasting
pan. A sturdy pan with good handles
is recommended.
- Use a
high quality roasting pan. The best materials for roasting pans are
heavy-gauge stainless steel, anodized or enameled aluminum, or enameled
steel or cast iron. These metals
ensure even cooking and keep the bottom of the food and the pan drippings
from burning. Also, heavy-gauge
metals allow stove-top searing and deglazing of pan juices for sauces and
gravies. Plain, untreated aluminum
is not a good choice for roasting pans because it can react with acidic
ingredients resulting in discolored food with a metallic flavor. Also, disposable aluminum pans are a
poor choice for roasting for a number of reasons: they can’t be used on the stove-top,
it’s nearly impossible to scrape up the browned bits from the bottom, they
have tall sides that trap steam around the food and discourage browning,
and they may buckle under the weight of a turkey or other heavy meat.
- A leave-in thermometer, inserted
into the thickest part of the breast or thigh, away from the bone, will
provide the most consistent results.
Roast your turkey until it is 165 degrees F. A leave-in thermometer is good because
you don’t have to open the oven (letting heat escape) and poke the turkey
more than once to test for doneness.
However, if you don’t have a leave-in thermometer, an instant read thermometer is fine –
just don’t poke the turkey too often or you’ll lose too much of the juice.
- For an
un-stuffed turkey: Some cooks roast the turkey breast side
down for the first one-third of the cooking time. This increases the rate at which thighs
cook so they will be done at about the same time as the breast.
- For a stuffed turkey: Loosely cover the breast with a thick
piece of aluminum foil for the first two-thirds of the cooking time. This slows the rate at which the breast
cooks, so it will be done at about the same time as the thighs.
- Basting: brushing food with liquid while it cooks
helps to create a delicious and attractive finish. Basting
liquid can be as simple as a good-quality oil or melted butter, or it
can be a seasoned mixture with flavorful liquids and aromatic
ingredients. It should also include
some fat to carry flavor and prevent the food from drying out. Avoid basting too often as opening the
oven door frequently will allow heat to escape and cause surface
evaporation that may lead to drying.
Also, use a good-quality basting brush that won’t drip on your oven
floor. Adding sugar and other sweet
ingredients, such as honey, maple syrup or melted jellies, will create a
delicious, glossy glaze. Baste with
sweetened mixtures during the last hour of roasting because the sugars can
burn easily. Brined meat and poultry in particular benefit from a final
glazing since the salt solution may inhibit deep browning. Many people don’t like to baste or
forget to do it because there are many other tasks to do when trying to
get Thanksgiving dinner on the table.
A Martha Stewart trick for ensuring a nice brown turkey skin is to
soak a large piece of cheese cloth in melted butter and drape it all over
the turkey just prior to roasting.
This actually works.
- Right before placing your turkey in the oven, add some water and/or broth to the bottom of the pan. Add more as the turkey roasts if it dries up. This will help keep the turkey moist and will also add some great flavor to your gravy.
- Before
carving the roasted turkey, allow
the turkey to rest for at least 20 – 30 minutes. If desired,
you can loosely cover the turkey with aluminum foil, but allow steam to
escape or the skin will become wet and not remain crisp. Resting time allows for some of the
juices to be absorbed back into the meat, making the meat more moist and
easier to carve.
- To tie or not to tie the legs: Tying the turkey legs together with
kitchen twine ensures that it will cook evenly and the turkey will hold
its shape for easier carving
However, it’s not imperative that you do it.
I have deliberately not discussed at what temperature you should cook your
turkey. There are many schools of
thought about this subject and you should figure out what works for you. Some people go low and slow – low temperature
for a long period of time; others deconstruct their turkey and cook the parts
at different times and different temperatures.
I could go on and on. I cook my
turkey whole at 450 degrees F for the first hour then reduce the temperature to
350 degrees F until done.
Happy cooking – Happy Thanksgiving!
CLASS: Gingerbread Playdough
Gingerbread Playdough
Ingredients
- 1 cup all purpose flour
- 1/2 cup salt
- 2 tsp. cream of tartar
- 1 tbsp. ground cinnamon
- 2 tsp. ground ginger
- 1 tsp. ground nutmeg
- 1 tsp. ground cloves
- 2 tbsp. vegetable oil
- 1 cup water
- 1 tsp orange extract {optional}
Instructions
- In a medium saucepan whisk together dry ingredients. Next mix in the water, oil, and orange extract and stir until a thick batter is formed. Cook the mixture over low/medium heat until a thick dough forms. Turn out onto parchment paper and knead until smooth. Makes about 2 cups of dough.
**If you would like to make this as just regular playdough, just omit spices and add anything you would like to your playdough such as glitter (add with the dry ingredients) or food coloring (add with the liquid ingredients). The sky is the limit!**
Friday, November 15, 2013
Instructions: 25 Days of Christ Ornament Advent

Items Needed:
- Ornament Kit
- Hot Glue Gun/Hot Glue (not included)
- Paint (not included)
- Paintbrushes (not included)
- Scissors (not included)
- Twine/String (not included)
- Website: http://25daysofchrist.com/pages/the-twenty-five-days **Note that some of our ornaments are different than the ones listed on the website. Follow the list below and still use the same scriptures, stories, quotes, etc. from the website.**
THE FOLLOWING DIRECTIONS GO IN ORDER OF THE ORNAMENTS:
Unless otherwise stated, twine/string used to hang the ornaments should be cut between 4-5 inches.
DAY 1: Star (The Birth of Christ)
DAY 5: Dove (Baptism of Jesus Christ)
DAY 7: Candle (Sermon on the Mount)
DAY 12: Number 10 (The Ten Lepers)
DAY 15: Water Bucket (Woman at the Well)
DAY 24 (Book of Mormon): Cloud (Appearance to the Nephites)
Unless otherwise stated, twine/string used to hang the ornaments should be cut between 4-5 inches.
DAY 1: Star (The Birth of Christ)
- Paint star, if desired.
- Hot glue ends of 4 inch twine/string for ornament hanger on the back.
- Paint head and body of Shepherd.
- Once dry, draw eyes and mouth on with fine tip sharpie.
- Cut a piece of linen 2 1/2 x 1 1/4 inches. Drape fabric over shepherd's head, securing with hot glue. If needed, trim linen.
- In folds of linen in back, hot glue string/twine for ornament hanger.
- Wrap thin brown ribbon (4 inches) around head of shepherd and hot glue into place.
- Hot glue wire shepherd's crook onto the front of shepherd with a small dot of hot glue.
- Paint Wise Men ornament, if desired.
- Tie twine/string for ornament hanger using hole drilled in ornament.
- With hot glue, attach one dowel to a piece of linen (approximately 2x3 inches), making sure the dowel sticks out on both sides. Roll a couple of times, gluing in place.
- Attach other dowel at other end of linen.
- Glue twine/string for ornament hanger in the middle of the back of one of the dowels.
DAY 5: Dove (Baptism of Jesus Christ)
- Using dove template, trace and cut out two doves out of stiff white felt.
- Match the doves up and hot glue string/twine in as you glue body & head together, leaving the wings unglued.
- Crease and fold down the wings.
- Add a dot for an eye with a fine tip sharpie, if desired.
- Place 3 fish beads in middle of square of net.
- Bunch net around fish and tie off with twine/string.
- Either use excess twine from tying net for ornament hanger, or hot glue another piece of twine/string as an ornament hanger.
DAY 7: Candle (Sermon on the Mount)
- Tie/Hot Glue twine/string for ornament hanger onto candle (in between flame and candle top).
- Paint boat, if desired.
- Using templates, cut out 2 small sails and one bigger sail out of stiff white felt.
- Measure and cut off 2 1/2 inches of skewer and hot glue it into the pre-drilled hole in top of the boat.
- Making sure to keep the top of the skewer inside the sails, glue it in between the two small sails also inserting the string/twin for the ornament hanger.
- Hot glue the bigger sail onto the front of the smaller sails, overlapping. (See picture)
- Paint bread and fish desired colors. Add eye to fish with a sharpie, if desired.
- Place bread and fish in pot and hot glue in place, if you want them to not be able to be removed.
- Hot glue string/twine on back of basket for ornament hanger.
- Paint Foot, if desired.
- Tie/Hot Glue string/twine on for ornament hanger.
- Paint body and head of person.
- Draw eyes/mouth on with a sharpie.
- Cut a thin long strip of linen and hot glue it around the man's head to look like a bandage.
- Hot glue string/twine on back of man's head for ornament hanger.
DAY 12: Number 10 (The Ten Lepers)
- Paint small square desired color. Let dry.
- Using the "10" that is cut out and glue/mod podge it onto the square.
- Hot glue string/twine on back for ornament hanger.
- Paint Sheep desired color.
- Hot glue string/twine on back for ornament hanger.
- Paint head and body of person.
- Draw eyes/mouth on with a sharpie.
- Break off/cut 2 pieces of skewer approximately 2 1/2 inches long.
- Cut a piece of linen approximately 2 inches by 3 inches. Hot glue skewer onto one of the longer sides of the linen and roll once, securing with hot glue (making sure the skewer is covered in linen.
- Attach the other skewer to the other long side of the linen.
- Hot glue man lying in stretcher.
- Hot glue/tie twine/string from one end of skewer to the other on both sides, to create an ornament hanger.
DAY 15: Water Bucket (Woman at the Well)
- Cut twine to at least 12 inches and wrap around top of water bucket, then use the rest to tie/glue as an ornament hanger.
- Hot glue string/twine on back for ornament hanger.
- Hot glue one end of string/twine to one end of rolling pin, then attach the other end with hot glue to the other end of the rolling pin.
- Paint donkey, if desired.
- Hot glue string/twine on back for ornament hanger.
- Cut 1 1/2 inch square of linen and fold in half and then arrange as desired.
- Hot glue cloth onto wooden bowl.
- Hot glue string/twine on back for ornament hanger.
- Paint block desired color.
- Using ribbon, tie a bow like you would on a gift.
- Hot glue string/twine under bow knot for ornament hanger.
- Paint rooster, if desired.
- Hot glue string/twine on back for ornament hanger.
- Cut string/twin at least 7 inches.
- Tie around nail, using nail head to hold the string on.
- Using excess string, tie into a loop for ornament hanger.
- Cut square of linen approximately 4 inches by 4 inches.
- Fold as many times as desired, using hot glue to secure in place.
- Hot glue twine/string as ornament hanger onto back of folded linen.
DAY 24 (Book of Mormon): Cloud (Appearance to the Nephites)
- Using template, cut out two cloud shapes from soft white felt.
- Hot glue string/twine for ornament hanger on inside of one of the cloud shapes.
- Hot glue cloud shapes together, making sure the ornament hanger is on the inside of the cloud.
- Paint heart, if desired.
- Hot glue string/twine on back for ornament hanger.
- Paint heart, if desired.
- Hot glue string/twine on back for ornament hanger.
- Using template, cut out two cloud shapes from soft white felt.
- Hot glue string/twine for ornament hanger on inside of one of the cloud shapes.
- Hot glue cloud shapes together, making sure the ornament hanger is on the inside of the cloud.
Enjoy your 25 Days of Christ Ornaments!
Instructions: Welcome Sign

Items Needed:
- 8x8 Wood Sign
- 12 Wood Tiles
- 3 Hooks
- Black Vinyl "Welcome"
- White Vinyl Seasons Pictures, 3 each (Flowers/Butterfly, Sun/Cloud, Leaves/Tree, Snowflakes)
- Contact Paper
- Paint (not included)
- Paintbrush (not included)
STEP 1: Paint all wood pieces desired colors. Let dry.
STEP 2: Apply welcome vinyl using contact paper as transfer tape. **This means to take the back off the contact paper and attach the sticky side to the front side of your vinyl. Then pull the back off the vinyl and apply the image where you want it. Then pull the contact paper off and the vinyl should be left where you want it on your board! Click HERE to watch a video of using transfer tape (it's the same as using the contact paper, but cheaper!) for vinyl.** Make sure that pre-drilled holes are at top.


STEP 3: Apply season pictures (one to each tile) using same method as above.
STEP 4: Screw in hooks.
STEP 5 (At Home): Thread ribbon of your choice through pre-drilled holes at top and tie to secure.
Enjoy your Welcome Sign!
Instructions: Pumpkin Turkey Set

Items Needed:
- Wooden Turkey Pieces (5 feathers, 1 head, 1 wattle, 1 beak)
- 6 Small Metal Rods
- Scissors (not included)
- Glue/Mod Podge (not included)
- Paper (not included)
- Paint (not included)
- Paintbrush (not included)
- Sharpie (not included)
STEP 1: Paint all wood pieces desired colors. Let dry.
STEP 2 (optional): Using your wood pieces as templates, cut out paper to fit onto each piece. Cut them a little bit inside the lines if you want the paint color to show as a border around the paper then glue/Mod Podge them onto the painted wood, if desired.
**Mod Podge Tip: To minimize wrinkles in the paper, apply Mod Podge to wood piece or back of paper and apply and then let dry completely before applying Mod Podge on top of paper.**

STEP 3: Hot glue beak onto wattle, and wattle onto head in correct location (see picture) and draw on eyes with Sharpie.
STEP 4 (at Home): Insert metal rods into wooden pieces when ready to put into pumpkin!
Enjoy your Pumpkin Turkey Set!
Instructions: Small Wooden Manger

Items Needed:
- Pre-cut Wood Pieces (4 legs, 2 manger sides, 2 cross pieces)
- 16 Nails
- Hammer (not included)
STEP 1: Lay one manger side down, with angled edge on the table and closest to the notches in the leg pieces. Nail two leg pieces in place, being careful not to hammer to hard. A smaller hammer may make this easier. **MAKE SURE YOU ARE USING THE PRE-DRILLED PILOT HOLES OR YOUR MANGER PIECES MAY SPLIT**
.JPG)
.JPG)


.JPG)
.JPG)
.JPG)
.JPG)
STEP 2: Using notches in leg pieces, slide the remaining 2 leg pieces on creating an "X" with the leg pieces on both sides.
.JPG)
STEP 3: Slide remaining manger side piece into place, matching up the angles. Lay it down on the table and line up the leg pieces with the edge of the manger.

STEP 4: Nail legs into place. Your manger should now look like the picture on the right.

.JPG)
STEP 5: Using 2 nails on each end, attach cross pieces to both sides of the manger. If desired, you can sand away the edges of your cross pieces to create angles on the ends (see picture below).
.JPG)
.JPG)
Enjoy your Small Wooden Manger!
Instructions: Kid's Holiday Paper Pack

Items Needed:
- Printouts
- Christmas Tree Shape Match (1 Page)
- Tic-Tac-Toe Board (1 Page)
- Holiday Matching Game (2 Pages)
- Silent Night Nativity (3 Pages - Optional: You can cut out the Silent Night pictures and glue them to the back of the Silent Night Nativity, if desired)
- Nativity Story Cards (5 Pages)
- Scrap Paper Tree Kit (1 Page of White Cardstock + Strips of Holiday Paper)
- Scissors (not included)
Christmas Tree Shape Match: Cut out shapes from bottom of page and glue into place. Can be colored before or after cutting.


Holiday Matching Game: Cut out all picture cards (there should be 2 of each one). Place them picture side down and try to find the matches!
Silent Night Nativity: Cut out each of the Silent Night Nativity cards. If desired, glue Silent Night cards on back of character cards.

Nativity Story Cards: Cut out each of the Story Cards. These match with the Silent Night Nativity cards and give a little more information on each of the pictures/parts of the Nativity story.


Enjoy your Kid's Holiday Paper Pack!
Instructions: Twine Star Decoration

Items Needed:
- 1 Pack of Wood Shims (10 pieces)
- Hot Glue Gun/Hot Glue (not included)
- Thumbtacks
- 2 Rolls of Twine
UPDATE: One other option, is if you want to paint the shims before applying the twine, then you can wrap less and let the paint color show through for a more rustic look. It looks great! Thanks, Christy for the idea!
STEP 1: Lay 10 wood shims in a star pattern. Make sure to arrange the shims so a thin end on one shim rests on the thick end of another shim.
STEP 2: Apply small amount of hot glue to each intersection, and then insert thumbtack to keep star shape in place. If desired, place 2 remaining shims as more support on back of star using glue and thumbtacks.
STEP 2: Apply small amount of hot glue to each intersection, and then insert thumbtack to keep star shape in place. If desired, place 2 remaining shims as more support on back of star using glue and thumbtacks.
STEP 3: **You will use a LOT of hot glue in this, so have your glue gun ready!** Starting at one of the star's points, wrap twine around frame, gluing often as you wrap. Avoid putting too much tension on the twine.

STEP 4: Cut a piece of twine about 8 inches long and tie a loop in the center. On the back of the star on one of the points, glue one loose end from the loop to each shim to hang the decoration.

Enjoy your Twine Star Decoration!
Instructions: Sharpie Plate

Items Needed:
- 1 Plate
- Sharpies(not included)
- Templates/Stencils, if desired (not included)
- Windex (not included)
- Paper Towels (not included)
STEP 1: Remove any labels/stickers from back of plate. Use a little Windex on a paper towel to help, if needed.
STEP 2: Using sharpie, decorate plate as desired. **If you make a mistake, a little Windex on a paper towel will take the design off and you can try again! I know from experience**
STEP 3: Preheat oven to 425 degrees. MAKE SURE IT'S COMPLETELY PREHEATED. Place decorated plate in oven for 30 minutes.
STEP 4: Turn off oven after 30 minutes and let the plate/oven cool down COMPLETELY before removing it. This is an important step!
STEP 5: Use your beautiful new plate, and wash as needed.
Enjoy your Sharpie Plate!
Instructions: Holiday Stove Top Potpourri Mix

Items Needed:
- 1 Orange
- 2 Cinnamon Sticks
- 1 T. Whole Cloves
- 1/2 Cup Cranberries
- Holiday Bag
- Directions tag (You can access the file HERE)
- Ribbon
STEP 1: Place Orange, Cinnamon Sticks, Cloves & Cranberries into bag, making sure to measure the amounts as listed above.


STEP 2: Tie closed with twist tie and add directions tag with ribbon. Give to your friends, neighbors or enjoy it for your own home!
Enjoy your Holiday Stove Top Potpourri Mix!
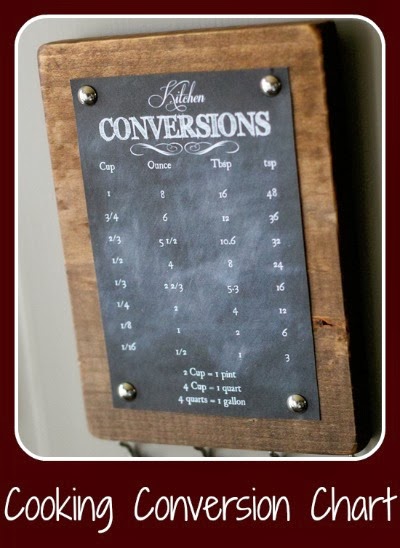
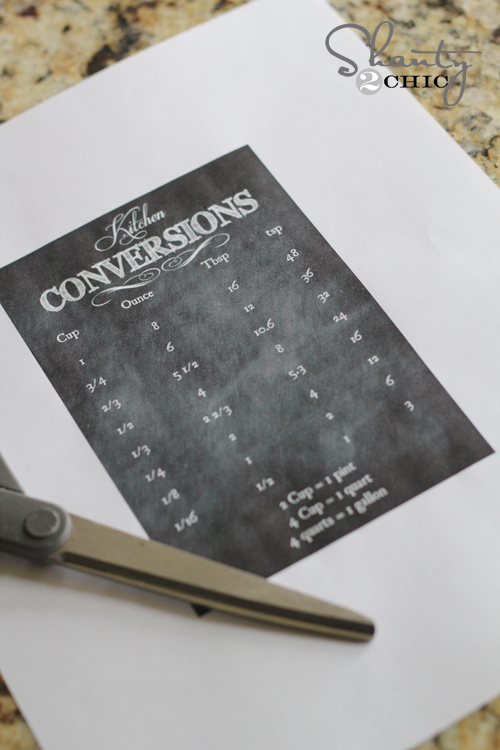
Instructions: Cooking Conversion Chart
Items Needed:
- Cooking Conversion Chart Printout (1 sheet)
- Scissors (not included)
- 5x7 Wood Plaque
- Sandpaper (not included)
- Paint, optional (not included)
- Paintbrush, optional (not included)
- Glue
- 4 Tacks
- Hammer (not included)
STEP 1: Sand any rough edges of your wood plaque. Make sure to brush any remaining dust off before moving on to Step 2.


STEP 2 (optional): Paint wood desired color.
STEP 3: Cut out Cooking Conversion Chart printout.
STEP 4: Center Cooking Conversion Chart printout on board and glue it down. This will keep it from bubbling/puckering when you hammer your tacks in. Let dry.
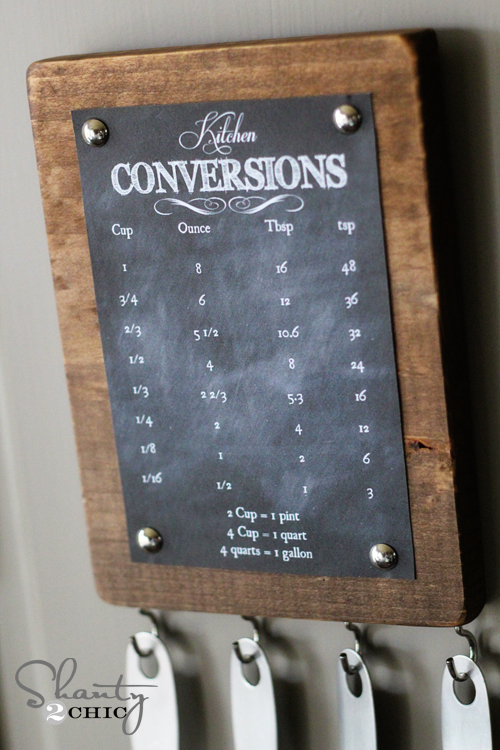
STEP 5: Being careful not to damage printout, hammer in the four tacks in each of the corners of the printout. Use a folded paper towel in between hammer and tack if you are worried about damaging the top of the tack.
Enjoy your Cooking Conversion Chart!
Instructions: Wooden Nativity Block Set

Items Needed:
- 6 Wooden Blocks
- Sandpaper
- Nativity Pictures Printout (you can access the document HERE. There are two sets to a page. Pictures courtesy of http://preparednotscared.blogspot.com)
- Other Paper, cut into 1 1/4 inch squares, if desired (not included)
- Scissors (not included)
- Corner Rounder, optional (not included)
- Mod Podge (not included)
- Paintbrush (not included)
STEP 1: Sand any rough edges of wooden blocks with sandpaper.
STEP 2: Cut out nativity pictures, using the grid printed on the paper as a guideline. If desired, also cut out other paper to cover sides not covered by a nativity picture.
STEP 3 (optional): Using corner rounder punch, round all the corners of paper/nativity pictures, if desired.

STEP 4: Using a small amount of mod podge, paint a little bit onto a side of the wood block then adhere picture/paper to it and go over the whole side of the block with mod podge as well being careful not to move the paper/picture as you brush it on.
STEP 5: Continue until all sides are covered (make sure you leave a side that is not drying, so you can set it on the table!)
STEP 6: Let dry.
Enjoy your Nativity Block Set!
Instructions: Simple Nativity

Items Needed:
- One 6 inch tall wooden block (Joseph)
- One 5 1/2 inch tall wooden block (Mary)
- Two wooden ball heads (Joseph & Mary)
- One 3 inch block (Baby Jesus)
- One small wooden head (Baby Jesus)
- Paint (not included)
- Paintbrush(s) (not included)
- Sandpaper (not included)
- Twine
- Hot Glue Gun/Hot Glue (not included)
STEP 1: Sand any rough edges on all of your wooden blocks/heads.
STEP 2: Paint bodies & heads desired colors. **Make sure and paint the shorter block for Mary and the taller block for Joseph** After dry, distress any edges with sandpaper, if desired.
STEP 3: Hot glue heads onto wooden blocks.
STEP 4: With a small amount of hot glue, glue Mary & Joseph together and then glue the Baby Jesus to the front, at an angle.

STEP 5: Wrap twine around (starting in front, and then wrapping all the way around and back to the front) and tie in a knot or bow. Hot glue, if necessary, to hold in place.
Enjoy your Simple Nativity!
Instructions: Clothespin Christmas Card Garland

Items Needed:
- 25 Clothespins
- Christmas Paper (not included)
- 25 Buttons
- Spool of Ribbon
- Mod Podge/Glue (not included)
- Paintbrush(s), optional (not included)
- Paint, optional (not included)
- Scissors (not included)
STEP 1 (optional): Paint clothespins Christmas colors, if desired.
STEP 2: Decorate each clothespin. Cut paper to fit onto front of clothespin and use glue/mod podge to adhere paper strips to front of clothespin.

STEP 3: Add buttons to the top part (the part you squeeze to open the clothespin) of each clothespin.
STEP 4 (At Home): Measure where you want to hang your garland and cut the desired amount of ribbon. Place clothespins on the garland and add Christmas cards as they arrive!
Enjoy your Christmas Card Garland!
Instructions: Cinnamon Stick Stars

Items Needed:
- 5 Cinnamon Sticks
- Hot Glue Gun/Glue (not included)
- Decorations, as desired (not included)
STEP 1: Following the picture below, arrange the cinnamon stick into a star shape, putting a SMALL dab of hot glue at each intersection.

STEP 2: Decorate as desired, using hot glue to secure decorations.

STEP 3 (optional): If desired, tie a small piece of string at the top of your ornament so it can be hung as an ornament.
Enjoy your Cinnamon Star Ornament!
Instructions: Gratitude Journal/Cards

Items Needed:
- Gratitude Journal/Card Printout (8 pages)
- Scissors (not included)
- Hole Punch, optional (not included)
- Binder Ring/Ribbon (not included)
STEP 1: Cut out each of the rectangles from the Gratitude Journal/Cards pages (there are 4 on every sheet, except for the last one there are only 3). If you want to use these as individual cards, you are done! Enjoy! If you want to make it into a Gratitude Journal, continue with the remaining steps.


STEP 2 (optional): Using hole punch, punch holes in the top left-hand corner of each page, making sure to punch the hole in approximately the same place on each card.
STEP 3 (At Home - optional): Put pages in desired order and insert binder ring or ribbon of your choosing. Your gratitude journal is ready to go!
Enjoy your Gratitude Journal/Cards!
Subscribe to:
Posts (Atom)